How Does AutomA Work?
In this post, we’re going to be talking about AutomA, what it is and how to use it.
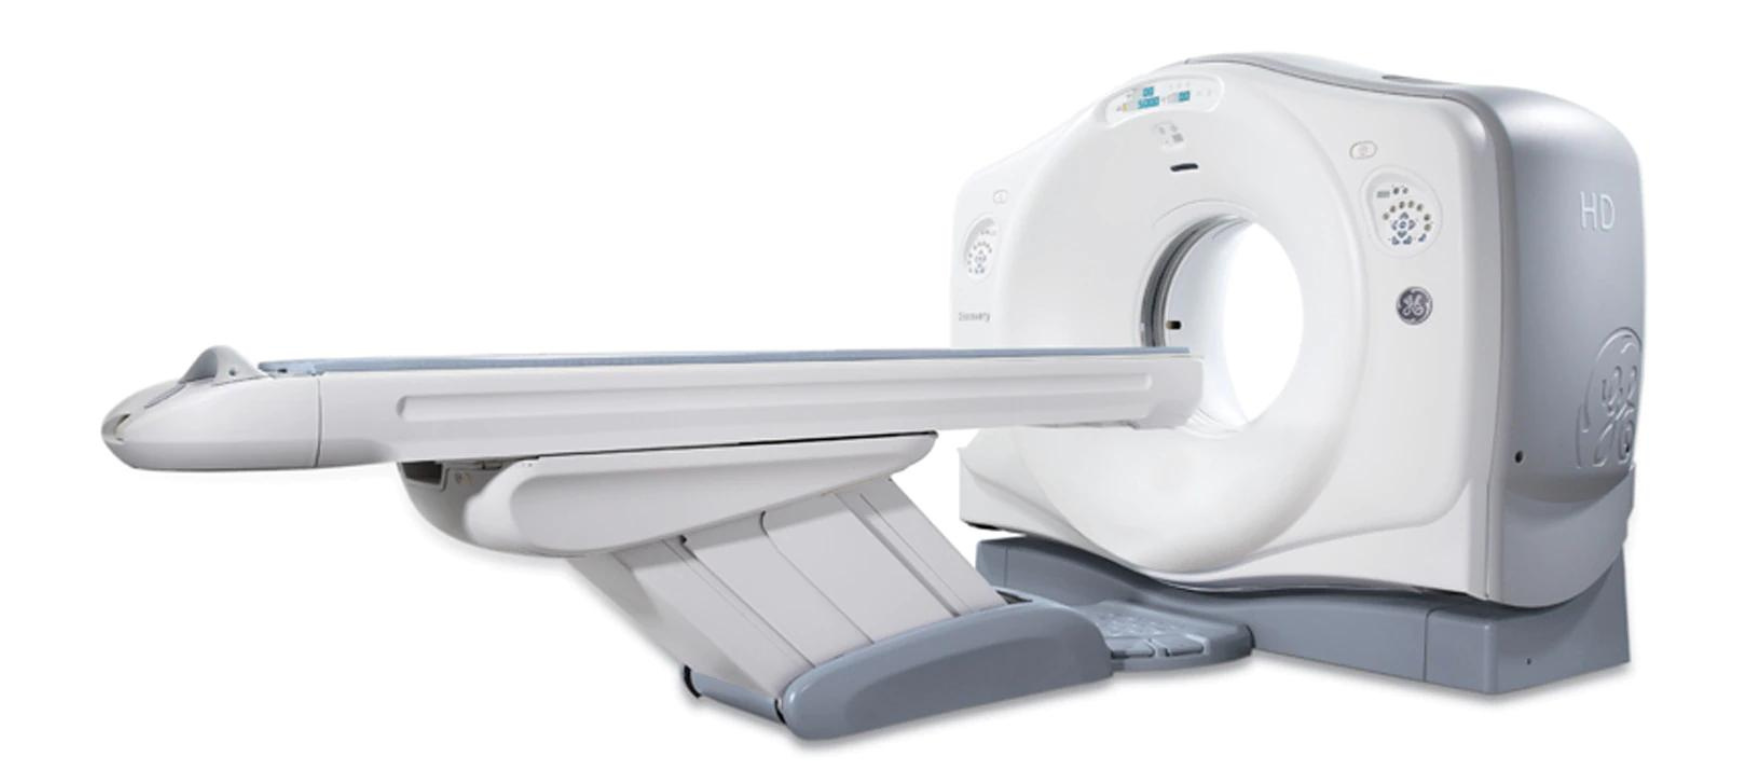
Whether you have a GE CT Scanner or you’re interested in getting a GE CT Scanner, we will provide you with an overview of what AutomA is all about.
Watch the video above on our YouTube channel as Eric walks you through exactly what AutomA and SmartmA are and uncovers some of the mystery surrounding these GE CT Scanner options.
Before we get too, it’s important to understand that this post uses the terms AutomA and SmartmA interchangeably to mean GE’s version of automated exposure control or tube current modulation. They are somewhat different and we’re going to talk about the differences.
What is AutomA?
When we’re using AutomA, we’re using a GE version of tube current modulation.
With AutomA, we’re able to modulate the dose in the Z axis. As we scan a patient from head to toe, the tube current is going to modulate based on the size, shape and density of the material that you’re going through. For example, if you’re scanning through the chest, we may be able to use a lower mA, whereas if we’re scanning through the abdomen and pelvis, we may need to use a higher mA. AutomA is going to automatically adjust the amount of mA that’s used as you’re scanning from the chest into the abdomen.
What is SmartmA?
Smart AutomA is a rotational RMA, allowing the scanner to change the mA in the X and Y planes. As the tube rotates around the patient, the mA is going to modulate up and down based on whether or not there’s more anatomy to penetrate and the anterior projection versus the lateral projection. To summarize, AutomA is only in the Z direction. So it’s a limited version of tube current modulation, whereas if you turn on SmartmA you get modulation in all three planes, the X, Y and Z plane. With either of these features enabled, it’s important for you to ISO center the patient.
What is the Importance of IsoCentering Your Patient?
When using either AutomA or SmartmA, it’s important for you to isocenter the patient. Isocentering the patient is important because you want to have an accurate size–shape model. AutomA is going to use your scout as well as the noise index to calculate how much mA the scanner should use as it scans through the patient.
What is Noise Index?
Before we discuss noise index, let’s talk a little bit about noise. Noise is going to be inversely related to the number of x–rays. We can think of x–rays and mA as being equivalent to each other. As a result, when we increase our mA or we produce more x–rays, we’re going to decrease the amount of noise in our image. This creates better images.
The opposite is also true. If we decrease the amount of x–rays or decrease our mA, we will increase the noise and create noisier images. The noise index is going to approximately equal the noise or the standard deviation in the central region of an image using a standard or uniform phantom. With your patient images, you can draw a region of interest in the center of the image and the noise index or the standard deviation should closely mimic your noise index that was set for the scan.
What is the Importance of Noise Index Values?
The other detail to know about AutomA or SmartmA is that the noise index value is going to be set for the first perspective reconstructed image series. You want to set your noise index values understanding the thickness of the first reconstructed slice. If it’s 2.5 millimeters or 5 millimeters, you’re going to want to set that noise index based on the slice thickness. For example, if you have a noise index of ten and the first reconstructed image series is a 5 millimeter, then your noise index or the standard deviation in that five millimeter slice should be close to ten. But if your first reconstructed image is 0.625, then AutomA is going to use a lot more mA to account for the loss of data in the thinner slices.
The GE CT Scanner Panel for mA Control
Let’s take a look at what this actually looks like on a GE scanner. On the scanner panel photo below, we can see that AutomA is turned on and SmartmA is not turned on. If you want to turn on SmartmA, you just click the button to turn it on. The panel also shows the reference noise index as well as the noise index.
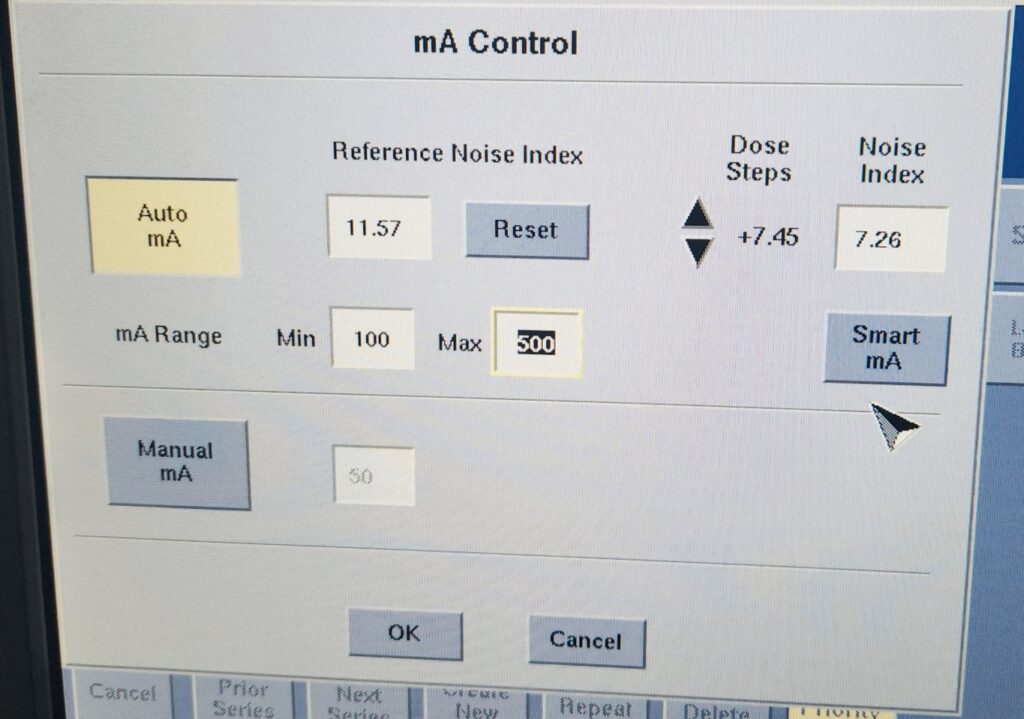
The Reference Noise Index is the default noise index for a given protocol, whereas the Noise Index is the noise index that’s going to be applied for that specific scan or patient.
We also have dose steps. The dose steps will increase or decrease the noise index by about 5% and then have an opposite effect of about 10% on the mA. You can click either of these buttons, the up or down on the dose steps and see how it changes the noise index compared to the reference noise index.
You’ll also note on here that you have an mA range with a minimum and a maximum. The great thing that GE does is apply that maximum mA so that you know you’ll never exceed a particular CTDI or radiation dose for a given patient.
You do want to pay attention to the mA that is given to the patient or the resultant KTVI whenever you’re doing dose reviews to make sure that you’re not maxing out this mA on every single patient. One challenge we see quite frequently is when AutomA is being used, every patient gets the maximum dose.
You can turn on the Manual mA and enter in the value of the mA that you want to apply for the scan and that will turn off both AutomA and SmartmA. GE does have some newer versions of software and while they look different, all the metrics are called the same and they work in the same way. You can take these concepts here and apply that them to the newer versions of software.
Conclusion
This pretty much covers the basics of AutomA and SmartmA, what noise index means, how noise index works, how to set your mA range and how to use AutomA and SmartmA to benefit your patients. This can ensure they’re receiving the correct radiation dose. This also helps you to produce consistent image quality from patient to patient and providing quality care to your patients.
If you have questions about AutomA, SmartmA, or how tube current modulation works for GE scanners, feel free to send us a note, drop us a comment and let us know how we can help you.
Ensuring your equipment is operating properly through an annual CT Physics Evaluation may be the best first step in providing a safe environment for your patients. Our CT Physics Evaluations are designed to be compliant with ACR, TJC, IAC, and State requirements for accreditation and compliance purposes. You can also always reach out to us if you have questions or want more information on why you should partner with us.