How To Use a Geiger Counter
In this week’s video, Eric from Olympic Health Physics explains how to use a Geiger Counter. Throughout the video, he demonstrates the Ludlum 14C with a pancake detector. He provides an overview of how to test the battery, how to ensure the counter is working properly, and how to read the panel.
What Is A Geiger Counter?
A Geiger Counter or Geiger Meter is an electronic instrument used to detect and measure the amount of ionizing radiation levels. They are widely used in various applications, including radiation protection and safety, radiation dosimetry, and the nuclear industry. If you work in a Nuclear Medicine department, you likely have a Geiger Counter to measure radiation in different aspects, such as wipe tests, area surveys, or exposure rate measurements.
Three Essential Checks Before Using Your Geiger Counter
When you’re using a Geiger Counter, there are three things that you need to check before you start using it. Throughout this post, we will be showing the Ludlum 14C with a pancake detector. Please note that there are many different Geiger Counter makes and models, so check your user manual for specific criteria for your equipment.
1. Is The Geiger Counter's Calibration Valid?
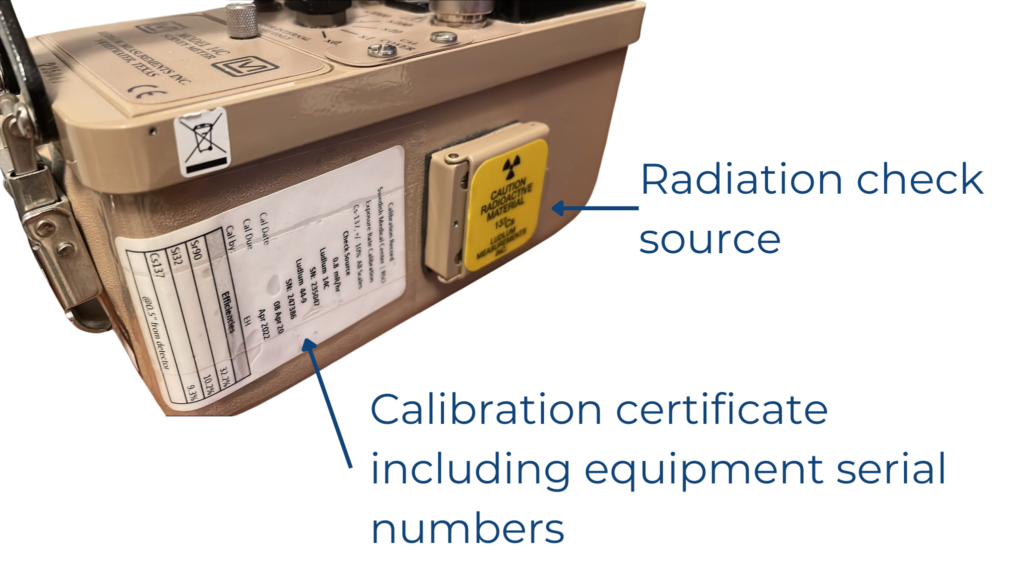
The first thing is you need to make sure that the Geiger Counter is in calibration. You need to look at the calibration label on it to make sure that it is still within calibration.
The calibration certificate usually includes the last date of calibration and the expiration date. The sticker also includes other useful information such as the model numbers, serial numbers, and efficiencies.
2. Is The Geiger Counter Responding Appropriately?
The second thing that you need to do is make sure that the instrument responds to a radiation source.
On this specific instrument, we have a check source with a window that we can we can open. We can then put our pancake detector over the cesium button source located on the side of the instrument to ensure the instrument is actually responding to radiation.
3. Are the Batteries Operating Within the Test Range?
The last thing you want to do is check the batteries to ensure the batteries are operating within the battery test range.
To test the batteries, first remove the pancake detector from the front of the Geiger counter. Then, turn the Geiger counter on and turn the knob to the lowest range setting. Test the battery by depressing the battery button and looking to make sure that the indicator stays in the battery test range. As long as the indicator stays within the battery test range, the battery is operating effectively.

Understanding the Instrument Scale Readout
Understanding how to properly read the instrument scale readout is important to ensuring you have the correct information.
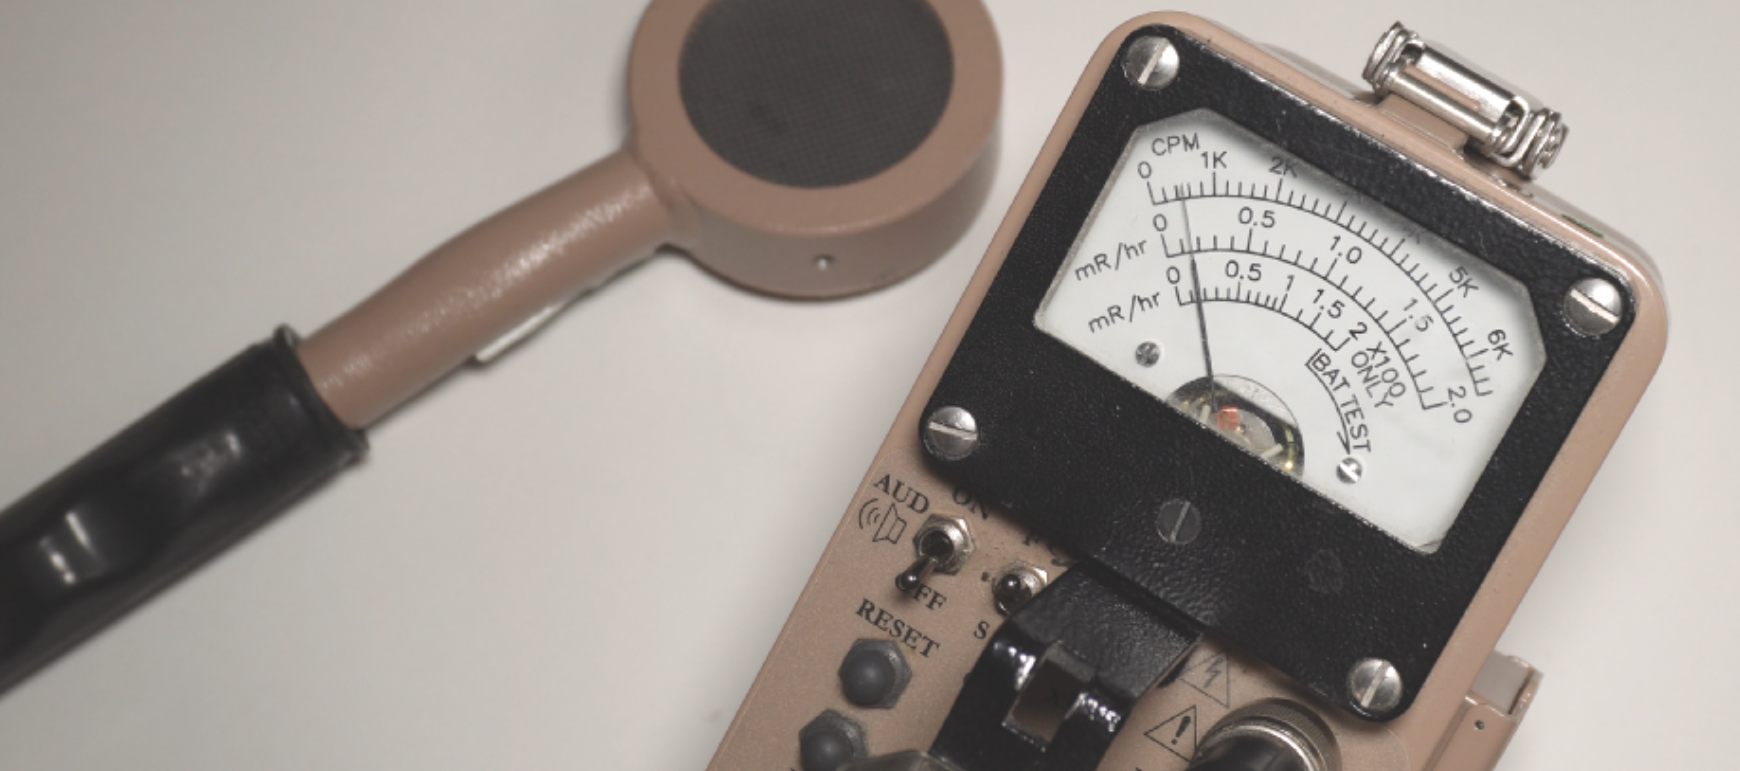
You’ll note on the Ludlum 14C Geiger counter instrument there are three different scales on the face of the survey meter. The first scale or the bottom scale is in milliroentgen per hour. You can also notice that the very bottom scale indicates “X100 ONLY”. The second scale or the mid-range scale is also in milliroentgen per hour. The upper scale that goes across the top of the readout is in counts per minute.
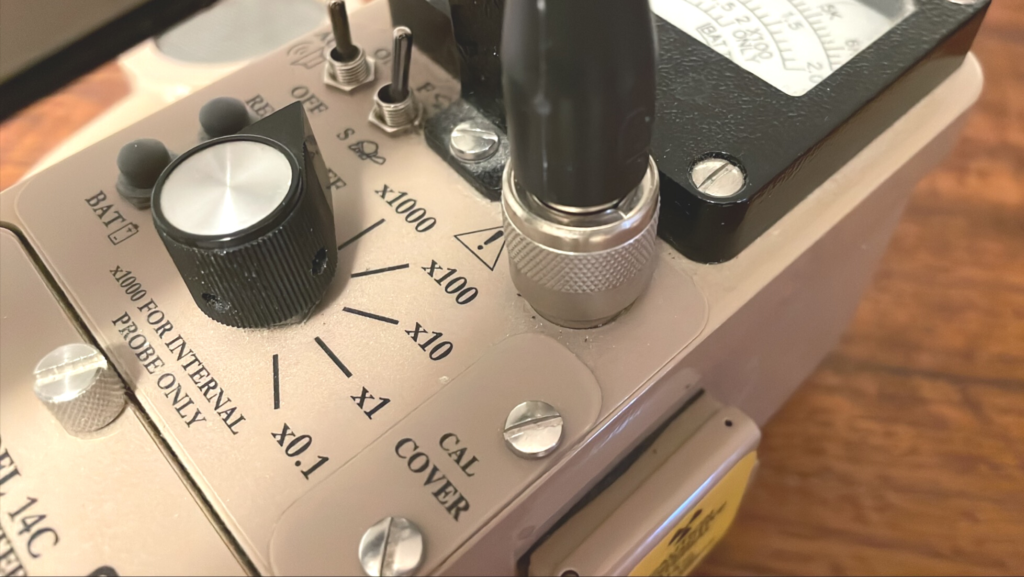
Below the instrument scale readout on the top of the meter are the various potentiometer values you can set for the Geiger counter. On this particular model, the Ludlum 14C, there are five potentiometer value setting options you can select. The value selected determines the multiplication factor for any reading that you see on the face of the survey meter.
The bottom three options include X0.1, X1, and X10 coincide with the middle and top readout. X100 is used for the bottom readout only. And the X1000 option is used for the internal probe only.
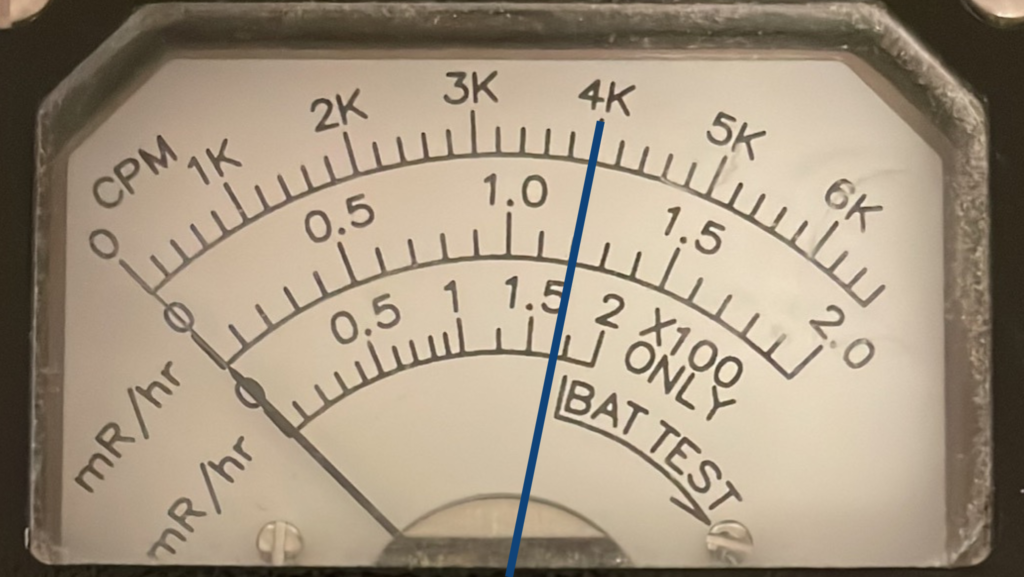
To understand how the potentiometer options and scale readout work together, consider the following example:
You select the value of X1 from the options available. When you scan the radiation source with the pancake detector, the needle on the readout stops at blue line on the example readout photo. In this example, the appropriate reading would be on either the middle or top scale range, depending on what information you require. In addition, the potentiometer value is X1, meaning the multiplication factor is only one. Therefore, the value seen is the actual measurement. So for this example, the reading is either 4,000 counts per minute or 1.2 milliroentgen per hour.
Suppose you had selected X10 and the needle result was the same. You would them multiple your readout results by 10 to determine your final measurement reading.
Sometimes on your survey meter, you may notice no deflection of the needle at all. If this happens, it can often be caused by having it set on too high of a scale. To fix this, flip down to the lowest potentiometer scale and you should start to see needle deflection.
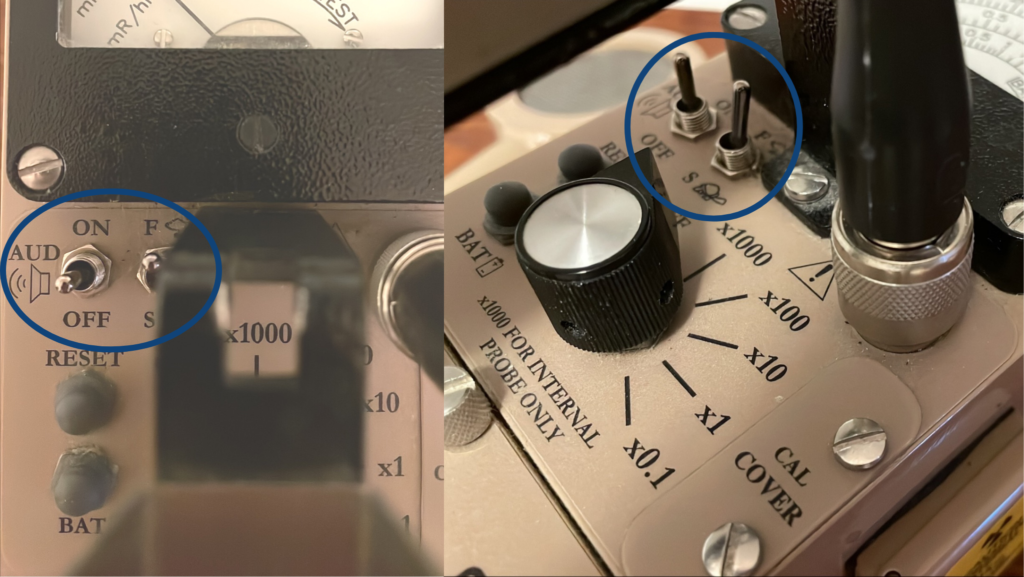
Audio and Speed
The Ludlum 14C Geiger Counter also offers two additional options: audio and speed.
To turn the audio on, flip the switch up and you will hear the audible clicks of radiation being detected. There is also a speed setting for fast or slow. The fast speed setting is good when looking for any kind of contamination. The slow setting is ideal when making a direct measurement of the check source.

So now you know the three things that you need to check before you use the instrument. Check the battery, check the calibration sticker to make sure that it’s still within calibration and check against a radiation source to make sure that the instrument responds to radiation. We also covered how to read the different scales on the Ludlum instrument so that you know which scales to use and how to use the the dial setting to select the right potentiometer on the instrument.
Questions and comments about radiation safety? Feel free to shoot them over to us. We’ll be happy to respond to any questions or comments that you have around radiation safety programs and be a resource for you.
Our team is dedicated to ensuring that your facilities’ radiation safety program functions in accordance to regulatory standards, sound radiation safety principles, and most importantly serves to protect staff, patients, and the general public from the hazards associated with ionizing radiation. To this end, Olympic Health Physics can provide a physicist to your organization to fulfill the Duties of the Radiation Safety Officer. To learn more, check out our RSO Services or click the link below.